

Have you ever wondered why the “Check Charge System” warning message illuminates on your Honda Accord?
This comprehensive guide provides insights into the common causes behind the warning message and offers step-by-step solutions to diagnose and resolve the problem.
Are you ready to take control of your Honda Accord’s charging system?
Let’s dive in!
What Does the Check Charge System Mean on a Honda Accord?
The “Check Charge System” warning message on a Honda Accord is an indication that there may be an issue with the vehicle’s charging system.
The charging system in a Honda Accord consists of the battery, alternator, voltage regulator, and related electrical components. The primary function of the charging system is to replenish the battery’s charge while providing electrical power to the vehicle’s systems.
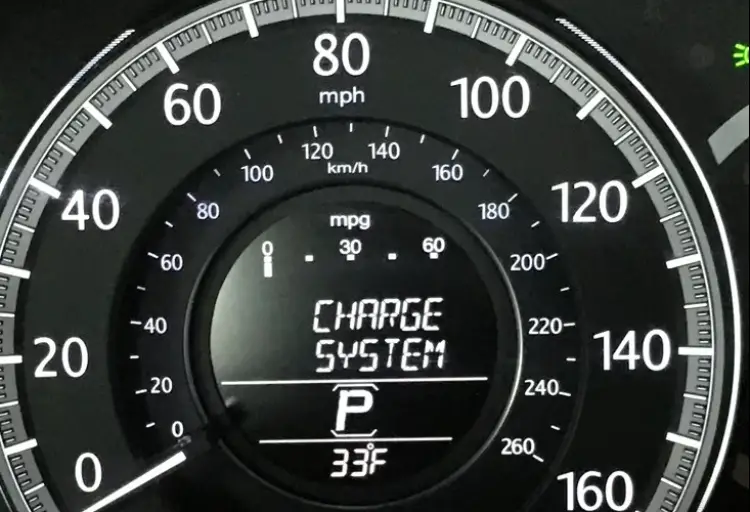
When you see this message or a related warning light (such as the Battery Warning Light or Check Engine Light) illuminate on your Honda Accord’s dashboard, it typically means that the system has detected a problem with one or more components.
It is essential to address the check charge system warning promptly to prevent potential breakdowns or further damage to the vehicle’s electrical system.
Can I Drive with the Check Charge System Honda Accord?
No, continuing driving with the check charge system warning message is not recommended for an extended period.
Continuing to drive with a faulty charging system can lead to a drained or undercharged battery, potential damage to the electrical system, and the risk of the vehicle stalling or being unable to start.
While it might be possible to drive a short distance or to a nearby repair shop if the warning message appears, it is advisable to do so with caution and minimize the use of electrical components. It is best to seek professional assistance to diagnose and rectify the issue as soon as possible.
Why Does My Honda Keep Saying Check Charge System?
Here are some common reasons why your Honda might repeatedly display the check charge system warning:
A faulty battery may not provide sufficient power to the electrical system, triggering the warning message.
Solution: Replace the old battery with a new one that matches your Honda’s specifications.
Solution: Replace the alternator with a new or reconditioned one. Consult a professional technician for this task.
Solution: Inspect the wiring and connections in the charging system for damage or corrosion. Repair or replace any damaged wires, and clean and secure all connections.
Solution: Replace a loose or damaged serpentine belt promptly. Ensure the new belt is properly tensioned to drive the alternator effectively.
This can occur due to incorrect voltage regulation, communication errors with other charging system components or malfunctioning sensors.
Solution: To resolve this issue, professional diagnosis, and potentially ECU repair or replacement may be required.
How to Reset the Check Charge System on the Honda Accord
When the check charging system warning comes on in your Honda, it’s crucial to take immediate action to address the issue. Here’s what you should do when this warning appears:
Step 1: Check Battery Connections
- Visually inspect the battery terminals and cables. Look for loose, corroded, or damaged connections. Tighten any loose connections and clean off any corrosion on the terminals using a battery terminal brush or a mixture of baking soda and water.
- Ensure the battery terminals are securely connected to the correct posts (positive to positive, negative to negative).
Step 2: Test the Battery
- Use a multimeter to check the voltage of the battery. A fully charged battery should read around 12.6 volts. If the voltage is significantly lower, it might need to be charged or replaced.
- Check the battery’s age. It may be due for replacement if it’s older than 3-5 years, even if it initially tests okay.
Step 3: Check the Alternator Belt
- Examine the alternator belt for signs of wear, cracks, or looseness. A loose or damaged belt can cause charging issues.
- Ensure the belt is properly tensioned. You may need to consult your vehicle’s manual for the correct tension specification.
Step 4: Test the Alternator
- Start the engine and let it idle.
- Using the multimeter, measure the voltage across the battery terminals. At idle, it should read around 13.8 to 14.5 volts if the alternator is functioning correctly.
- Increase the engine’s RPMs by revving it slightly. The voltage should rise slightly with increased RPM.
- If the voltage remains low or drops as the RPM increases, it could indicate a faulty alternator.
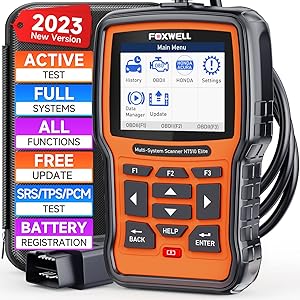
Step 5: Use an OBD-II Code Reader to Read the Trouble Codes
- Plug the OBD-II Code Reader into the OBD-II port under the dashboard, typically near the driver’s seat. Make sure the vehicle is turned off when you do this.
- Turn the ignition to the “On” position (engine not running), and scan for diagnostic trouble codes (DTCs).
- Refer to your vehicle’s service manual or use an online resource to interpret the codes. The codes will give you valuable information about the nature of the problem.
- Pay close attention to any codes related to the charging system, such as codes related to the alternator, voltage regulator, or other related components.
Step 6: Address the Issue
You can determine the appropriate steps for addressing the issue depending on the codes you retrieve. For example, replace the alternator or the regulator.
Step 7: Reset the Warning Light
After addressing the issue, you can use the code reader to clear the DTCs and reset the Check Charge System warning light. Make sure the issue is resolved before doing this.
What’s Next?
In conclusion, the Check Charge System warning message in your Honda Accord should never be ignored. It serves as an important indicator of potential issues within the charging system, which can lead to battery failure and electrical malfunctions if left unaddressed.
By following the troubleshooting guide provided in this article, you can identify common causes and take action to diagnose and resolve the problem.
Moreover, an OBD-II code reader can provide valuable insights into the specific problem within the charging system. Don’t hesitate to own one that fits your Honda Accord.

Recommended for you
Subaru Oil Light: Causes and Fixes
Check Hybrid System on Prius: What Should I Do?
Check AWD System on Toyota Highlander: Causes and Solutions