

The check engine light will rarely turn on because of a false reading. However, a lot of car owners and novice mechanics may think this to be the case. The problem may be elusive and quite complex if you can’t get the light to turn off.
You may want to inspect the car for common causes like O2 sensor failure and a loose fuel cap before taking it to the shop. If you are satisfied that your vehicle is in good condition, you can follow our guide on permanently disabling the check engine light.
Disclaimer: We do not advise car owners to turn off the check engine light. The light is a sign that the onboard system has detected a malfunction in the vehicle’s emissions, fuel, ignition, or exhaust systems.
Purpose Of The Check Engine Light
The Check Engine Light (CEL), also referred to as the Malfunction Indicator Lamp (MIL), comes in orange, yellow, or amber, depending on the vehicle. The light can either flash or get illuminated continuously. A flashing check engine light indicates a more severe problem as compared to an always-lit one. An example of a severe problem is catalytic converter failures that can become fire hazards very quickly.
For this reason, we encourage you to have your vehicle checked and diagnosed for every possible problem. If you turn off the light permanently, you will not know when your car has catastrophic issues or even minor ones. Disabling the light is quite simple and costs nothing. However, the possible problems following not knowing when there’s something wrong with your car are costly to fix.
However, there are some circumstances that you may be persuaded to turn it off. A majority of the cases involve a check engine light that keeps turning on even after the issue has been fixed. Frequent visits to the mechanic can be expensive and quite tedious, especially when the issue is minor.
The check engine light feature also helps protect used car buyers from getting scammed and removes faulty cars from being used in specific jobs.
Removing the check engine light or permanently disabling it can be considered fraudulent concealment, which is illegal. That means that if you disable the light and the vehicle causes damage to another person, then you can be criminally charged for knowingly concealing the vehicle’s faults.
Read more: Why is my “check engine” light flashing and my car shaking?
How To Permanently Disable The Check Engine Light
The first course of action should be fixing the problem and resetting the CEL. In case you have tried resetting the CEL, and it persists, then you can check our guide below to see whether you ticked all the right boxes. For serious malfunctions like powertrain control module failures, the CEL will keep popping up after resets until you fix the underlying problem.
Once you have confirmed that all the reset options failed and your vehicle is in good condition, you can follow these simple steps to disable the CEL permanently. Again, you must note that this is not the recommended option. The best action is to use an OBD2 scan tool to diagnose the problems and fix them before resetting the check engine light.
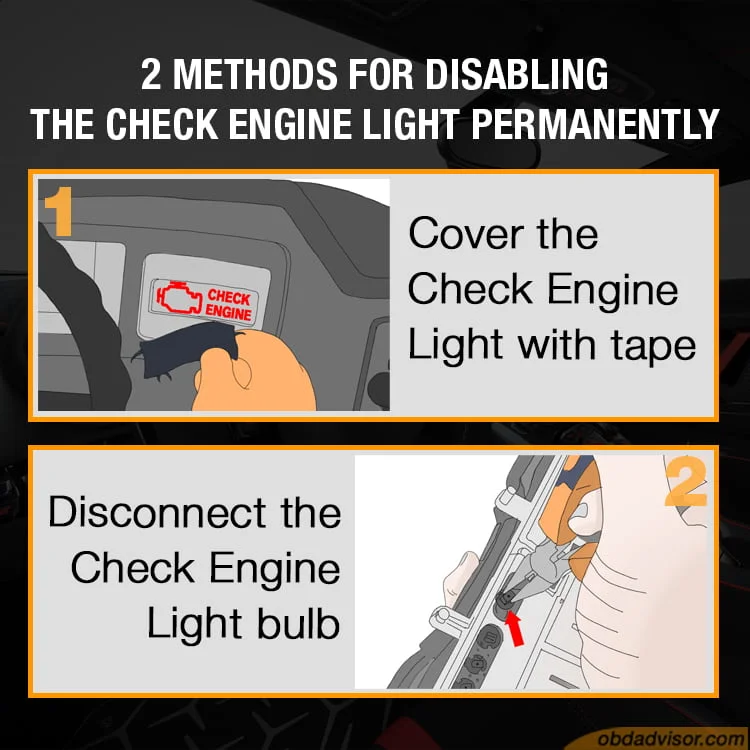
1. Cover The Check Engine Light With Tape
This method is the easiest and quickest fix that will not land your vehicle in more trouble and lead to more expenses. The solution is temporary as you will eventually have to take it to a mechanic. Take a small piece of black electrical duct tape (about an inch) and place it over the check engine light.
The tape will stop the CEL from distracting you. However, it would be best to take it to the mechanic shop soon before the malfunctions worsen. You should set a reminder so that you do not forget it over time, as it is in many cases.
2. Disconnect The Check Engine Light Bulb
This is a manual method that will require you to be handy with spanners and wrenches to physically remove the CEL bulb. The stored trouble codes will still show up when you use an OBD scan tool which means any persistent codes will not disappear. Do this if you are using your vehicle and not on another as it can be considered a crime.
- With a set of screwdrivers, unscrew all the screws from the gauge bezel to get to the backside of the gauge panel. You will need to play around with the steering wheel by tilting it to get the bezel out.
- Once the gauge bezel is disconnected, proceed to unplug the gauge panel from the car. Make sure to do this process carefully and gently to make sure you do not break any connections.
- Locate the check engine light bulb from the back of the panel and use a pair of pliers to disconnect it. Disconnect the bulb and look through the now vacant hole to see if it reads CEL/MIL/ Service Engine Soon; this is to let you know you unplugged the correct bulb.
- Plug the gauge bezel back into position without the CEL light bulb.
- Turn the vehicle on, and the CEL will not be there to get illuminated.
There is a simple way of finding out if the previous owner of a used car similarly tampered with the CEL. Hold down the trip reset button while starting the vehicle. Keep holding the trip button, and it will prompt a gauge testing protocol.
There are a few tests that you can switch through by pressing the trip reset button. The one you want is the ‘bulb’ test which illuminates all the bulbs on the gauge panel. You will see the indication of the test (bulb) under the Select/Reset display. If the CEL does not come on, then it means it has been removed.
Read more: 2001 Honda Accord SRS light is ON: Why? How to turn it off?
How To Reset The Check Engine Light
Here are the recommended procedures for getting rid of the CEL without doing any unlawful or dangerous procedures.
To determine the cause of an illuminated CEL, you will need an OBD2 scan tool for vehicles from 1996 and after. Vehicles that were made before 1996 will require a separate specialized scan tool, but some may only need an adapter to connect to the OBD2 scanner.
The OBD connector is usually located beneath the dashboard or under the steering wheel column. Connect the recommended OBD2 scanner to your car’s OBD2 port and read the stored codes. These codes will show you what caused the CEL to turn on. Some of the causes include a loose fuel cap, low car battery, faulty spark plugs, faulty oxygen sensor, or a malfunctioning MAF sensor.
Proceed to follow repair instructions from your vehicle’s manual or another approved source to fix the underlying issue. You can choose to reset the codes using the scan tool if you are confident you fixed the problem.
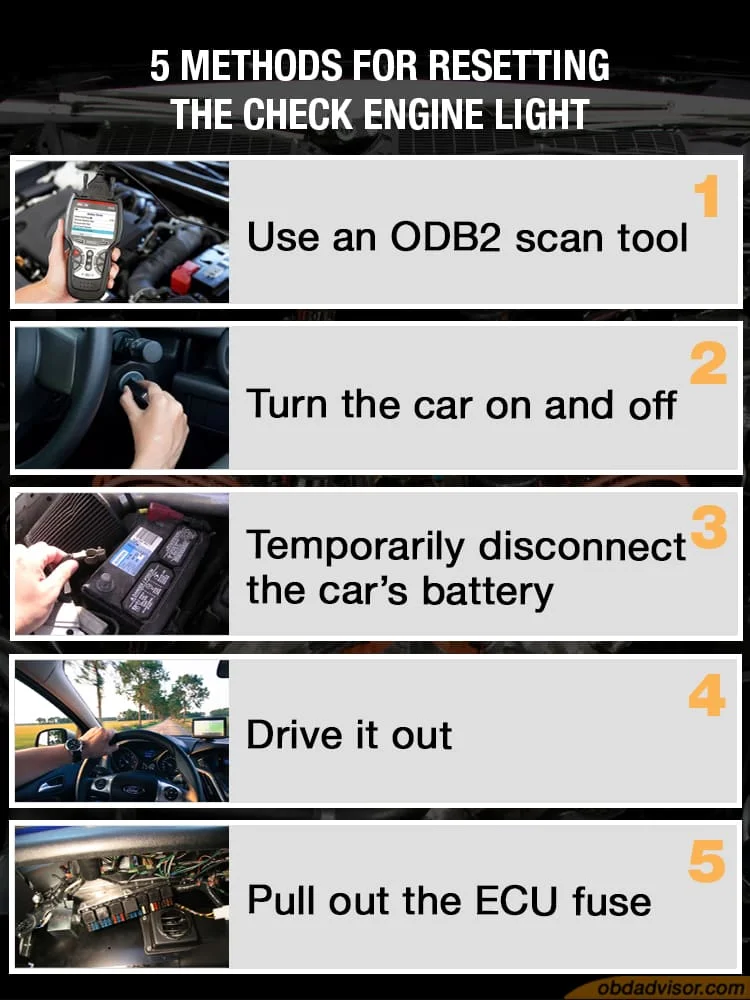
These are the five procedures you can use to reset the CEL once the problems have been fixed.
1. Use An OBD2 Scan Tool
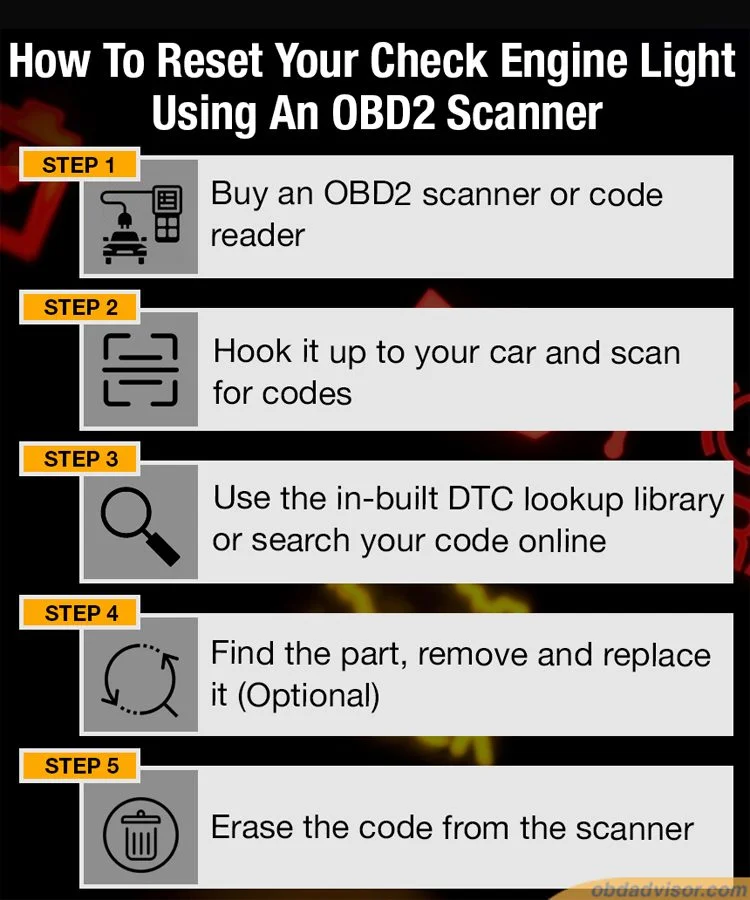
Step 1: Buy An OBD2 Scanner Or Code Reader
Expect to pay around $20-$50 for an affordable OBD2 scanner/code reader, but keep in mind that this is a one-time cost. If you take your vehicle to the mechanic every time your check engine light comes on, you will likely pay at least $100 for every visit.
A little bit now on how an OBD2 scanners/ code reader works.
Your car has a computer in it that receives signals from a variety of automotive systems. If something is not working correctly in your vehicle, then the system will send a signal to the computer, and the check engine light turns on, so you know something is wrong.
When you plug in your OBD2 code reader, it will display the code that shows the faulty part to help you diagnose the issue.
Read my review of the best OBD2 Scanners for Turning Off the Check Engine Light and take one for yourself.
Step 2: Hook It Up To Your Car And Scan For Codes
When you have your OBD2 scanner, look under your driver’s side dashboard, and you’ll see a port that the reader can fit into. Make sure that your car is NOT running while you perform this step.
Once you have the OBD2 scanner connected, turn the key to the “on” position, but don’t turn the engine on. Press the scan button on your OBD2 scanner and give it a few seconds or a couple of minutes to search for codes.
Once it finds the problem, it will either give you a single code or a list of codes. Write that code number down and move on to the next step.
Step 3: Use The In-Built DTC Lookup Library Or Search Your Code Online
While the code you receive may not mean anything to you right away, you will soon be very informed about what it means. Some OBD2 scanners have an in-built DTC Lookup Library that gives you the definitions of the codes.
If your scanner doesn’t have it, enter that code into Google or another search engine and see what you can find. Tons of automotive forums will help you diagnose just about any code that your OBD reader displays. If your code isn’t pulling up any results in the search engine, try to include your vehicle’s make and model as well.
Most of the time, several other people have seen the same code pop up on their vehicle. You can read step-by-step instructions online without having to ask a mechanic!
And the best part is you don’t even have to be an expert in many cases. However, if you have no idea what you are doing, it’s best to ask someone who has a little bit of knowledge about working on cars.
Step 4: Find The Part, Remove And Replace It (Optional)
Once you know what needs to happen, now it’s time to take action and replace the part. Online forums should tell you exactly where to find the faulty part on your vehicle, but you can also resort to your vehicle’s owner’s manual for help.
When you find the part, you can simply order it online or go to a store that sells auto parts to get it replaced. You will usually find that the part is very inexpensive and only takes a few minutes of your time to replace it.
Step 5: Erase The Code From The Scanner
Once the part is replaced, plug the OBD2 code reader back in and press and hold the “erase” button. This essentially resets the scanner since the problem is fixed. Assuming there are no other problems, the check engine light on your vehicle should now be gone.
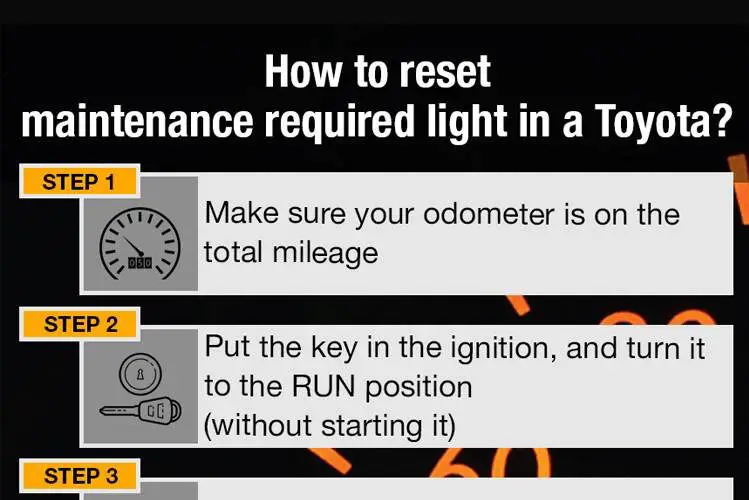
Bonus: How to reset maintenance required light in a Toyota [with video]
2. Turn The Car On And Off
There is a feature in certain vehicles that can allow you to reset the trouble codes by just turning the car on and off three times.
Step 1: Put the key in the ignition and turn the vehicle on for approximately one second.
Step 2: Proceed to immediately turn the vehicle off and let it stay off for the same one second.
Step 3: Perform the above step three times to automatically allow the vehicle to reset the check engine light.
This is a feature that helps eliminate any unnecessary trouble codes that are stored despite having no car problems. Make sure to check if your car has this feature, or else it won’t work. If your vehicle can do this but fails, then the CEL indicates a real issue that has to be solved.
3. Temporarily Disconnect The Car Battery
Step 1: Pop up the hood and use a wrench to unplug the negative terminal battery cable.
Step 2: Let the battery sit as it is for a few seconds to a few minutes.
Step 3: Plug back the negative terminal cable of the battery and turn on the ignition.
After approximately one minute, the CEL may come on if the process wasn’t successful; otherwise, it will stay off.
4. Drive It Out
Your vehicle can reset the check engine light after approximately 50 to 100 miles on the road. The powertrain control module (PCM), also known as the engine control module/ unit (ECM/ECU), will regularly check the CEL to see what causes it. The PCM will proceed to turn the light off if there is no underlying issue. This is the easiest and first step you should take to fixing the CEL.
5. Pull Out The ECU Fuse
Pulling out the ECU fuse will allow you to disconnect the power supply to the onboard computer, thereby cutting off the electricity completely. Approach this method with caution since it can cause further system complications in some high-tech vehicles.
Step 1: Put the key in the ignition and turn it on without cranking up the engine.
Step 2: Locate the fuse to the ECU on the fuse box.
Step 3: Disconnect the fuse and let the system sit that way for a few minutes.
Step 4: Proceed to turn off the ignition before plugging in the fuse.
Step 5: Turn on the ignition to start the car and let it idle for a while.
Conclusion
The check engine light is not something that you should be overly concerned about since the related issues are usually easy to fix. Furthermore, your vehicle is still drivable unless the car starts showing other symptoms that may indicate a huge problem.
You can quickly get rid of the CEL by using simple tools to diagnose and fix the causes. The handiest tool for this is an OBD scan tool that can show you why the light is illuminated. You can then take note of the displayed trouble codes on the scanner and use your car’s user manual to follow repair procedures.
Read more: FOXWELL NT301: Universal OBD2 Scanner for Turning Off Check Engine Light Review
few friends and additionally sharing in delicious.
And certainly, thank you for your effort!
Regards
and found most people will go along with your views on this
web site.”